Facebook and R

Part 1 How do people at Facebook use R?

tamar Rosenn, Facebook

Itamar conveyed how Facebook’s Data Team used R in 2007 to answer two questions about new users: (i) which data points predict whether a user will stay? and (ii) if they stay, which data points predict how active they’ll be after three months?

For the first question, Itamar’s team used recursive partitioning (via the rpartpackage) to infer that just two data points are significantly predictive of whether a user remains on Facebook: (i) having more than one session as a new user, and (ii) entering basic profile information.

For the second question, they fit the data to a logistic model using a least angle regression approach (via the lars package), and found that activity at three months was predicted by variables related to three classes of behavior: (i) how often a user was reached out to by others, (ii) frequency of third party application use, and (iii) what Itamar termed “receptiveness” — related to how forthcoming a user was on the site.

source-http://www.dataspora.com/2009/02/predictive-analytics-using-r/

and cute graphs like the famous

https://www.facebook.com/notes/facebook-engineering/visualizing-friendships/469716398919


and

studying baseball on facebook

https://www.facebook.com/notes/facebook-data-team/baseball-on-facebook/10150142265858859

by counting the number of posts that occurred the day after a team lost divided by the total number of wins, since losses for great teams are remarkable and since winning teams’ fans just post more.


But mostly at

https://www.facebook.com/data?sk=notes and https://www.facebook.com/data?v=app_4949752878


and creating new packages

1. jjplot (not much action here!)

https://r-forge.r-project.org/scm/viewvc.php/?root=jjplot

though

I liked the promise of JJplot at

http://pleasescoopme.com/2010/03/31/using-jjplot-to-explore-tipping-behavior/

2. ising models

https://github.com/slycoder/Rflim

https://www.facebook.com/note.php?note_id=10150359708746212

3. R pipe

https://github.com/slycoder/Rpipe


even the FB interns are cool

http://brenocon.com/blog/2009/02/comparison-of-data-analysis-packages-r-matlab-scipy-excel-sas-spss-stata/


Part 2 How do people with R use Facebook?

Using the API at https://developers.facebook.com/tools/explorer

and code mashes from


http://romainfrancois.blog.free.fr/index.php?post/2012/01/15/Crawling-facebook-with-R

http://applyr.blogspot.in/2012/01/mining-facebook-data-most-liked-status.html

but the wonderful troubleshooting code from http://www.brocktibert.com/blog/2012/01/19/358/

which needs to be added to the code first


and using network package

>access_token=”XXXXXXXXXXXX”

Annoyingly the Facebook token can expire after some time, this can lead to huge wait and NULL results with Oauth errors

If that happens you need to regenerate the token

What we need
> require(RCurl)
> require(rjson)
> download.file(url=”http://curl.haxx.se/ca/cacert.pem”, destfile=”cacert.pem”)

Roman’s Famous Facebook Function (altered)

> facebook <- function( path = “me”, access_token , options){
+ if( !missing(options) ){
+ options <- sprintf( “?%s”, paste( names(options), “=”, unlist(options), collapse = “&”, sep = “” ) )
+ } else {
+ options <- “”
+ }
+ data <- getURL( sprintf( “https://graph.facebook.com/%s%s&access_token=%s&#8221;, path, options, access_token ), cainfo=”cacert.pem” )
+ fromJSON( data )
+ }


Now getting the friends list
> friends <- facebook( path=”me/friends” , access_token=access_token)
> # extract Facebook IDs
> friends.id <- sapply(friends$data, function(x) x$id)
> # extract names
> friends.name <- sapply(friends$data, function(x) iconv(x$name,”UTF-8″,”ASCII//TRANSLIT”))
> # short names to initials
> initials <- function(x) paste(substr(x,1,1), collapse=””)
> friends.initial <- sapply(strsplit(friends.name,” “), initials)

This matrix can take a long time to build, so you can change the value of N to say 40 to test your network. I needed to press the escape button to cut short the plotting of all 400 friends of mine.
> # friendship relation matrix
> N <- length(friends.id)
> friendship.matrix <- matrix(0,N,N)
> for (i in 1:N) {
+ tmp <- facebook( path=paste(“me/mutualfriends”, friends.id[i], sep=”/”) , access_token=access_token)
+ mutualfriends <- sapply(tmp$data, function(x) x$id)
+ friendship.matrix[i,friends.id %in% mutualfriends] <- 1
+ }


Plotting using Network package in R (with help from the  comments at http://applyr.blogspot.in/2012/01/mining-facebook-data-most-liked-status.html)

> require(network)

>net1<- as.network(friendship.matrix)

> plot(net1, label=friends.initial, arrowhead.cex=0)

(Rgraphviz is tough if you are on Windows 7 like me)

but there is an alternative igraph solution at https://github.com/sciruela/facebookFriends/blob/master/facebook.r


After all that-..talk.. a graph..of my Facebook Network with friends initials as labels..


Opinion piece-

I hope plans to make the Facebook R package get fulfilled (just as the twitteR  package led to many interesting analysis)

and also Linkedin has an API at http://developer.linkedin.com/apis

I think it would be interesting to plot professional relationships across social networks as well. But I hope to see a LinkedIn package (or blog code) soon.

As for jjplot, I had hoped ggplot and jjplot merged or atleast had some kind of inclusion in the Deducer GUI. Maybe a Google Summer of Code project if people are busy!!

Also the geeks at Facebook.com can think of giving something back to the R community, as Google generously does with funding packages like RUnit, Deducer and Summer of Code, besides sponsoring meet ups etc.


(note – this is part of the research for the upcoming book ” R for Business Analytics”)


ps-

but didnt get time to download all my posts using R code at

https://gist.github.com/1634662#

or do specific Facebook Page analysis using R at

http://tonybreyal.wordpress.com/2012/01/06/r-web-scraping-r-bloggers-facebook-page-to-gain-further-information-about-an-authors-r-blog-posts-e-g-number-of-likes-comments-shares-etc/

Updated-

 #access token from https://developers.facebook.com/tools/explorer
access_token="AAuFgaOcVaUZAssCvL9dPbZCjghTEwwhNxZAwpLdZCbw6xw7gARYoWnPHxihO1DcJgSSahd67LgZDZD"
require(RCurl)
 require(rjson)
# download the file needed for authentication http://www.brocktibert.com/blog/2012/01/19/358/
download.file(url="http://curl.haxx.se/ca/cacert.pem", destfile="cacert.pem")
# http://romainfrancois.blog.free.fr/index.php?post/2012/01/15/Crawling-facebook-with-R
facebook <- function( path = "me", access_token = token, options){
if( !missing(options) ){
options <- sprintf( "?%s", paste( names(options), "=", unlist(options), collapse = "&", sep = "" ) )
} else {
options <- ""
}
data <- getURL( sprintf( "https://graph.facebook.com/%s%s&access_token=%s", path, options, access_token ), cainfo="cacert.pem" )
fromJSON( data )
}

 # see http://applyr.blogspot.in/2012/01/mining-facebook-data-most-liked-status.html

# scrape the list of friends
friends <- facebook( path="me/friends" , access_token=access_token)
# extract Facebook IDs
friends.id <- sapply(friends$data, function(x) x$id)
# extract names 
friends.name <- sapply(friends$data, function(x)  iconv(x$name,"UTF-8","ASCII//TRANSLIT"))
# short names to initials 
initials <- function(x) paste(substr(x,1,1), collapse="")
friends.initial <- sapply(strsplit(friends.name," "), initials)

# friendship relation matrix
#N <- length(friends.id)
N <- 200
friendship.matrix <- matrix(0,N,N)
for (i in 1:N) {
  tmp <- facebook( path=paste("me/mutualfriends", friends.id[i], sep="/") , access_token=access_token)
  mutualfriends <- sapply(tmp$data, function(x) x$id)
  friendship.matrix[i,friends.id %in% mutualfriends] <- 1
}
require(network)
net1<- as.network(friendship.matrix)
plot(net1, label=friends.initial, arrowhead.cex=0)

Created by Pretty R at inside-R.org

Secure Browsing from Mobile and PC ( Tor ,PeerNet, WasteAgain)

While Tor remains the tool of choice with pseudo-techie hacker wannabes , there is enough juice and smoke and mirrors on the market to confuse your average Joe.

For a secure browsing experience on Mobile – do NOT use either Apple or Windows OS

Use Android  and this app called Orbot in particular

Installing Tor with a QR code

Orbot is easy to install by simply scanning the following QR code with your Android Barcode scanner.

Android QR code

Installing Tor from the Android Market

Orbot is available in the Android Market.

ENTER PEERNET

If you have a Dell PC, well just use PeerNet to configure and set up your own network around the neighbourhood. This is particularly applicable if you are in country that is both repressive and not so technologically advanced. Wont work in China or USA.

http://support.dell.com/support/edocs/network/p70008/EN/vista_7/peernet.htm

What is a peer network?

A peer network is a network in which one computer can connect directly to another computer. This capability is accomplished by enabling access point (AP) functionality on one of the computers. Other computers can then connect to this computer in the same way that they would connect to a physical AP. If Internet Connection Sharing is enabled on the computer that has the AP functionality, computers that connect to that computer have Internet connectivity as well.

A basic peer network, which requires no networking knowledge or experience to set up, should meet the needs of most home users and small businesses. By default, a basic peer network is configured with the strongest available security (see How do I set up a basic peer network?).

For users who are familiar with wireless networking technology, advanced configuration features are available to do the following:

Change security settings (see How do I configure my peer network?)
Choose which method (push button or PIN) computers with Wi-Fi Protected Setup™ capability can join your peer network (see How do I allow peer devices to join my peer network using Wi-Fi Protected Setup technology?)
Change the DHCP Server IP address (see How do I configure my peer network?).
Change the channel on which to operate your peer network (see How do I configure my peer network?)

 If you are really really in a need for secure browsing (like you are maybe a big hot shot in the tech world), I suggest go over to VMWare

http://www.vmware.com/products/player/

create a seperate Linux (Ubuntu for ease) virtual disc, then download the Tor Browser Bundle from

https://www.torproject.org/projects/torbrowser.html.en for surfing and a Peernet (above) or  a prepaid one time use disposable mobile pre-paid wireless card. It is also quite easy to delete your virtual disc in times of emergencies (but it is best to use encryption even when in Ubuntu https://help.ubuntu.com/community/EncryptedHome)

IRC chat is less secure than you think it is thanks to BOT  Trawlers- so I am hoping someone in the open source community updates Waste Again for encrypted chats http://wasteagain.sourceforge.net/

What is “WASTE again”?

“WASTE again” enables you to create a decentralized and secure private mesh network using an unsecure network, such as the internet. Once the public encryption keys are exchanged, sending messages, creating groupchats and transferring files is easy and secure.

Creating a mesh

To create a mesh you need at least two computers with “WASTE again” installed. During installation, a unique pair of public and private keys for each computer is being generated. Before the first connection can be established, you need to exchange these public keys. These keys enable “WASTE again” to authenticate every connection to other “WASTE again” clients.

After exchanging the keys, you simply type in the computers IP address to connect to. If that computer is located behind a firewall or a NAT-router, you have to create a portmap first to enable incoming connections.

At least one computer in your mesh has to be able to accept incoming connections, making it a “public node”. If no direct connection between two firewalled computers can be made, “WASTE again” automatically routes your traffic through one or more of the available public nodes.

Every new node simply has to exchange keys with one of the connected nodes and then connect to it. All the other nodes will exchange their keys automatically over the mesh.

Moving data between Windows and Ubuntu VMWare partition

I use Windows 7 on my laptop (it came pre-installed) and Ubuntu using the VMWare Player. What are the advantages of using VM Player instead of creating a dual-boot system? Well I can quickly shift from Ubuntu to Windows and bakc again without restarting my computer everytime. Using this approach allows me to utilize software that run only on Windows and run software like Rattle, the R data mining GUI, that are much easier installed on Linux.

However if your statistical software is on your Virtual Disk , and your data is on your Windows disk, you need a way to move data from Windows to Ubuntu.

The solution to this as per Ubuntu forums is –http://communities.vmware.com/thread/55242

Open My Computer, browse to the folder you want to share.  Right-click on the folder, select Properties.  Sharing tab.  Select the radio button to “Share this Folder”.  Change the default generated name if you wish; add a description if you wish.  Click the Permissions button to modify the security settings of what users can read/write to the share.

On the Linux side, it depends on the distro, the shell, and the window manager.

Well Ubuntu makes it really easy to configure the Linux steps to move data within Windows and Linux partitions.


NEW UPDATE-

VMmare makes it easy to share between your Windows (host) and Linux (guest) OS


Step 1

and step 2

Do this


and

Start the Wizard

when you finish the wizard and share a drive or folder- hey where do I see my shared ones-


see this folder in Linux- /mnt/hgfs (bingo!)

Hacker HW – Make this folder //mnt/hgfs a shortcut in Places your Ubuntu startup

Hacker Hw 2-

Upload using an anon email your VM dark data to Ubuntu one

Delete VM

Purge using software XX

Reinstall VM and bring back backup


Note time to do this


-General Sharing in Windows


Just open the Network tab in Ubuntu- see screenshots below-

Windows will now ask your Ubuntu user for login-

Once Logged in Windows from within Ubuntu Vmware, this is what happens

You see a tab called “users on “windows username”- pc appear on your Ubuntu Desktop  (see top right of the screenshot)

If you double click it- you see your windows path

You can now just click and drag data between your windows and linux partitions , just the way you do it in Windows .

So based on this- if you want to build  decision trees, artifical neural networks, regression models, and even time series models for zero capital expenditure- you can use both Ubuntu/R without compromising on your IT policy of Windows only in your organization (there is a shortage of Ubuntu trained IT administrators in the enterprise world)

Revised Installation Procedure for utilizing both Ubuntu /R/Rattle data mining on your Windows PC.

Using VMWare to build a free data mining system in R, as well as isolate your analytics system (thus using both Linux and Windows without overburdening your machine)

First Time

  1. http://downloads.vmware.com/d/info/desktop_end_user_computing/vmware_player/4_0Download and Install
  2. http://www.ubuntu.com/download/ubuntu/downloadDownload Only
  3. Create New Virtual Image in VM Ware Player
  4. Applications—–Terminal——sudo apt get-install R (to download and install)
  5.                                          sudo R (to open R)
  6. Once R is opened type this  —-install.packages(rattle)—– This will install rattle
  7. library(rattle) will load Rattle—–
  8. rattle() will open the GUI—-
Getting Data from Host to Guest VM
Next Time
  1. Go to VM Player
  2. Open the VM
  3. sudo R in terminal to bring up R
  4. library(rattle) within R
  5. rattle()
At this point even if you dont know any Linux and dont know any R, you can create data mining models using the Rattle GUI (and time series model using E pack in the R Commander GUI) – What can Rattle do in data mining? See this slideshow-http://www.decisionstats.com/data-mining-with-r-gui-rattle-rstats/
If Google Docs is banned as per your enterprise organizational IT policy of having Windows Explorer only- well you can see these screenshots http://rattle.togaware.com/rattle-screenshots.html

Google Cloud SQL

Another xing bang API from the boyz in Mountain View. (entry by invite only) But it is free and you can test your stuff on a MySQL db =10 GB

Database as a service ? (Maybe)— while Amazon was building fires (and Fire)

—————————————————————–

https://code.google.com/apis/sql/index.html

What is Google Cloud SQL?

Google Cloud SQL is a web service that provides a highly available, fully-managed, hosted SQL storage solution for your App Engine applications.

What are the benefits of using Google Cloud SQL?

You can access a familiar, highly available SQL database from your App Engine applications, without having to worry about provisioning, management, and integration with other Google services.

How much does Google Cloud SQL cost?

We will not be billing for this service in 2011. We will give you at least 30 days’ advance notice before we begin billing in the future. Other services such as Google App Engine, Google Cloud Storage etc. that you use with Google Cloud SQL may have their own payment terms, and you need to pay for them. Please consult their documentation for details.

Currently you are limited to the three instance sizes. What if I need to store more data or need better performance?

In the Limited Preview period, we only have three sizes available. If you have specific needs, we would like to hear from you on our google-cloud-sqldiscussion board.

When is Google Cloud SQL be out of Limited Preview?

We are working hard to make the service generally available.We don’t have a firm date that we can announce right now.

Do you support all the features of MySQL?

In general, Google Cloud SQL supports all the features of MySQL. The following are lists of all the unsupported features and notable differences that Google Cloud SQL has from MySQL.

Unsupported Features:

  • User defined functions
  • MySql replication

Unsupported MySQL statements:

  • LOAD DATA INFILE
  • SELECT ... INTO OUTFILE
  • SELECT ... INTO DUMPFILE
  • INSTALL PLUGIN .. SONAME ...
  • UNINSTALL PLUGIN
  • CREATE FUNCTION ... SONAME ...

Unsupported SQL Functions:

  • LOAD_FILE()

Notable Differences:

  • If you want to import databases with binary data into your Google Cloud SQL instance, you must use the --hex-blob option with mysqldump.Although this is not a required flag when you are using a local MySQL server instance and the MySQL command line, it is required if you want to import any databases with binary data into your Google Cloud SQL instance. For more information, see Importing Data.
How large a database can I use with Google Cloud SQL?
Currently, in this limited preview period, your database instance must be no larger than 10GB.
How can I be notified when there are any changes to Google Cloud SQL?
You can sign up for the sql-announcements forum where we post announcements and news about the Google Cloud SQL.
How can I cancel my Google Cloud SQL account?
To remove all data from your Google Cloud SQL account and disable the service:

  1. Delete all your data. You can remove your tables, databases, and indexes using the drop command. For more information, see SQL DROP statement.
  2. Deactivate the Google Cloud SQL by visiting the Services pane and clicking the On button next to Google Cloud SQL. The button changes from Onto Off.
How do I report a bug, request a feature, or ask a question?
You can report bugs and request a feature on our project page.You can ask a question in our discussion forum.

Getting Started

Can I use languages other than Java or Python?
Only Java and Python are supported for Google Cloud SQL.
Can I use Google Cloud SQL outside of Google App Engine?
The Limited Preview is primarily focused on giving Google App Engine customers the ability to use a familiar relational database environment. Currently, you cannot access Google Cloud SQL from outside Google App Engine.
What database engine are we using in the Google Cloud SQL?
MySql Version 5.1.59
Do I need to install a local version of MySQL to use the Development Server?
Yes.

Managing Your Instances

Do I need to use the Google APIs Console to use Google Cloud SQL?
Yes. For basic tasks like granting access control to applications, creating instances, and deleting instances, you need to use the Google APIs Console.
Can I import or export specific databases?
No, currently it is not possible to export specific databases. You can only export your entire instance.
Do I need a Google Cloud Storage account to import or export my instances?
Yes, you need to sign up for a Google Cloud Storage account or have access to a Google Cloud Storage account to import or export your instances. For more information, see Importing and Exporting Data.
If I delete my instance, can I reuse the instance name?
Yes, but not right away. The instance name is reserved for up to two months before it can be reused.

Tools & Resources

Can I use Django with Google Cloud SQL?
No, currently Google Cloud SQL is not compatible with Django.
What is the best tool to use for interacting with my instance?
There are a variety of tools available for Google Cloud SQL. For executing simple statements, you can use the SQL prompt. For executing more complicated tasks, you might want to use the command line tool. If you want to use a tool with a graphical interface, the SQuirrel SQL Client provides an interface you can use to interact with your instance.

Common Technical Questions

Should I use InnoDB for my tables?
Yes. InnoDB is the default storage engine in MySQL 5.5 and is also the recommended storage engine for Google Cloud SQL. If you do not need any features that require MyISAM, you should use InnoDB. You can convert your existing tables using the following SQL command, replacing tablename with the name of the table to convert:

ALTER tablename ENGINE = InnoDB;

If you have a mysqldump file where all your tables are in MyISAM format, you can convert them by piping the file through a sed script:

mysqldump --databases database_name [-u username -p  password] --hex-blob database_name | sed 's/ENGINE=MyISAM/ENGINE=InnoDB/g' > database_file.sql

Warning: You should not do this if your mysqldump file contains the mysql schema. Those files must remain in MyISAM.

Are there any size or QPS limits?
Yes, the following limits apply to Google Cloud SQL:

Resource Limits from External Requests Limits from Google App Engine
Queries Per Second (QPS) 5 QPS No limit
Maximum Request Size 16 MB
Maximum Response Size 16 MB

Google App Engine Limits

Google App Engine applications are also subject to additional Google App Engine quotas and limits. Requests from Google App Engine applications to Google Cloud SQL are subject to the following time limits:

  • All database requests must finish within the HTTP request timer, around 60 seconds.
  • Offline requests like cron tasks have a time limit of 10 minutes.
  • Backend requests to Google Cloud SQL have a time limit of 10 minutes.

App Engine-specific quotas and access limits are discussed on the Google App Engine Quotas page.

Should I use Google Cloud SQL with my non-High Replication App Engine application?
We recommend that you use Google Cloud SQL with High Replication App Engine applications. While you can use use Google Cloud SQL with applications that do not use high replication, doing so might impact performance.
Source-
https://code.google.com/apis/sql/faq.html#supportmysqlfeatures

Data Mining with R GUI -Rattle #Rstats

Why is RATTLE my favorite R package?
because it allows data mining in a very nice interface.
Complicated software need not have complicated interfaces.
Have a look-

(Note- download rattle from http://rattle.togaware.com)

For better visibility please click the full screen button or click the second pps below- automatically advances every 5 secs

Using R with MySQL #rstats

A brief tutorial to working with R and MySQL. MySQL belongs to Oracle is one of the most widely used databases now.

1. Download mySQL from
http://www.mysql.com/downloads/mysql/  or (http://www.mysql.com/downloads/mirror.php?id=403831)
Click Install -use default options, remember to note down the password=XX
2.Download the ODBC connector from http://www.mysql.com/downloads/connector/odbc/5.1.htmlThe Data Sources (ODBC) can be located from the Control Panel in Windows7

Install ODBC Connector by double clicking the .msi file downloaded in Step 2-
Check this screenshot in ODBC Connectors to verify-
Note this is the Drivers tab in ODBC Data Source Administrator
Click the System DSN and Configure MySQL using the add button 
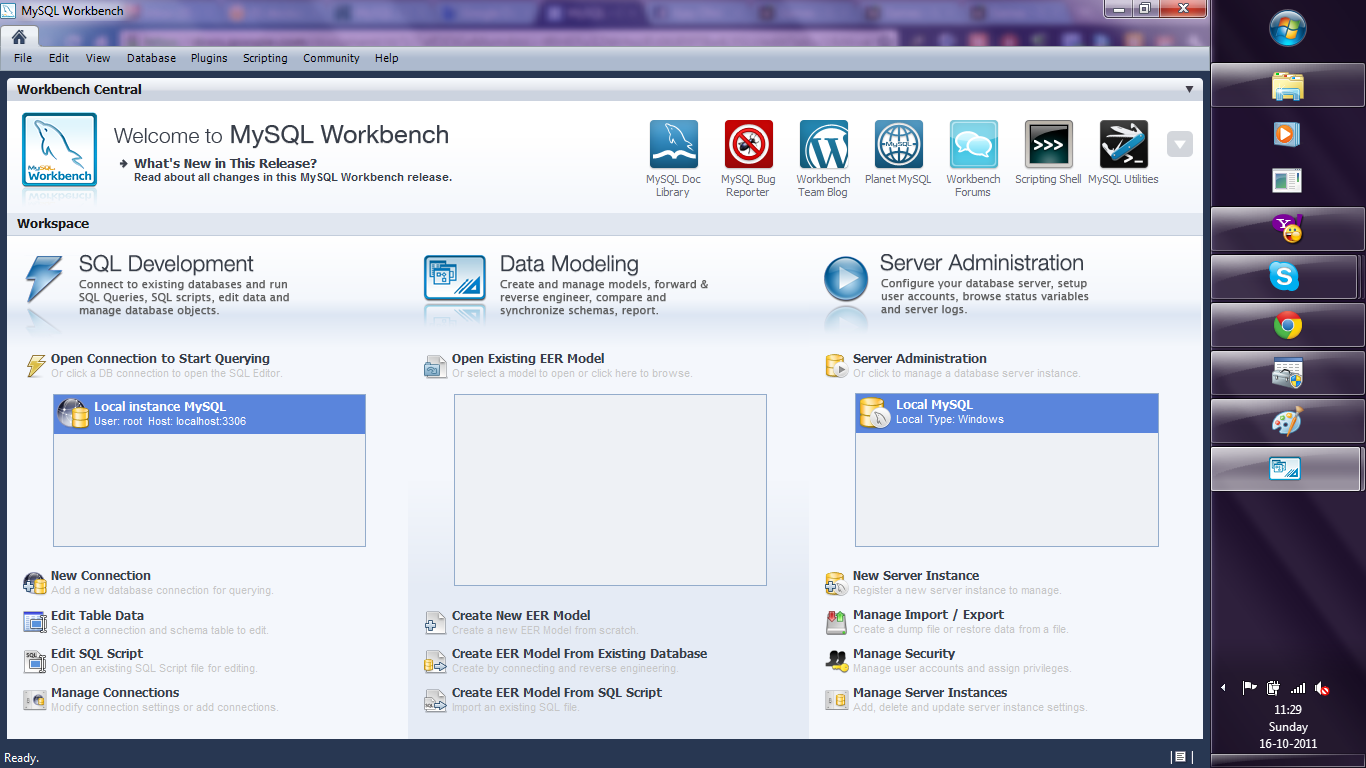
Use the configuration options shown exactly here. The user is root, the TCP/IP Server is local host, use the same password in Step 1 and the Database is MySQL
Test the connection

Click OK to finish this step.
Click the User DSN tab (and repeating the step  immediately above -Add, and Configure the connection using options The user is root, the TCP/IP Server is local host, use the same password in Step 1 and the Database is MySQL , Test the connection and OK to add the connection

3. Download the MySQL workbench from http://www.mysql.com/downloads/workbench/

This is very helpful to configuring the database
http://www.mysql.com/downloads/mirror.php?id=403983#mirrors

Create a new table using the options in the screenshots below

Open Connection

You can create a new table using the options as below,
Once created you can also add new variables (using the Columns Tab)

MySQL allows you create new columns very easily
The  SQL commands are automatically generated.
Click Apply  to execute the changes to the Database.

Now we start R
Type the commands in the screenshot below to create a connection to the Database in MySQL
> library(RODBC)
> odbcDataSources()
> ajay=odbcConnect(“MySQL”,uid=”root”,pwd=”XX”)
> ajay
> sqlTables(ajay)
>tested=sqlFetch(ajay,”host”)

Note- this is a brief tutorial for beginners without getting into too many complexities of database administration and management, to start using R and MySQL.

%d bloggers like this: